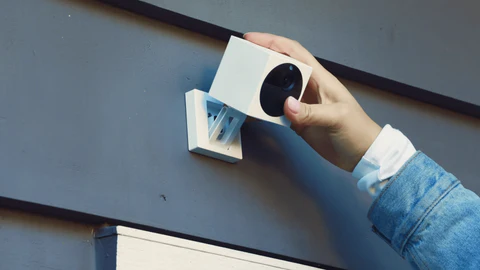
Outdoor security cameras are a powerful way to protect homes and businesses. They help monitor activity, deter crime, and provide real-time alerts. But one key question often comes up: How do you power an outdoor security camera properly and safely?
Whether you’re installing a camera at your front gate, driveway, backyard, or commercial property, powering it correctly ensures uninterrupted performance, 24/7 surveillance, and long-term reliability.
This complete guide explains the different ways to power outdoor cameras, their pros and cons, and the best solutions available. For those in Adelaide, Australia, professional help is just a click away: 👉 CCTV & Camera Security Services in Adelaide – Aussie Tech Solutions
Why Power Matters for Outdoor Security Cameras
Improper or unreliable power connections can lead to:
- Camera shutdowns during critical moments
- Loss of footage
- Increased maintenance costs
- Safety hazards (fire, shocks, weather damage)
Powering your camera the right way ensures continuous protection and helps avoid technical issues in the long run.
1. Main Ways to Power an Outdoor Security Camera
There are three main power methods used to run outdoor cameras. Choosing the right one depends on the camera type, location, and budget.
1.1 Wired Power (AC Adapter or Plug-in)
Many cameras use a standard power adapter that plugs into a nearby electrical outlet.
✔ Pros:
- Constant power supply
- Reliable for long-term use
- Works well with high-resolution cameras
❌ Cons:
- May require outdoor-rated extension cords
- Needs weatherproofing for outdoor outlets
- Limited by proximity to power sources
Best for:
- Homes with outdoor outlets or garages
- Permanent installations
1.2 PoE (Power over Ethernet)
PoE cameras receive power and data through a single Ethernet cable. A PoE switch or injector powers the camera through the same cable that connects it to your NVR (Network Video Recorder).
✔ Pros:
- Clean setup (no separate power cable)
- Stable connection (no Wi-Fi needed)
- Ideal for large installations
❌ Cons:
- Requires Ethernet cable routing
- Needs a PoE switch or injector
- May require professional installation
Best for:
- Businesses and large homes
- Users needing 24/7 wired reliability
1.3 Battery-Powered or Solar Cameras
Battery-powered cameras are wireless and often come with solar panel options for continuous charging.
✔ Pros:
- Easy to install (no wires)
- Great for remote locations
- Low maintenance if paired with solar
❌ Cons:
- Limited battery life without solar
- May not support constant recording
- Battery replacements needed (if solar not used)
Best for:
- Remote areas, sheds, driveways
- Renters or DIY users
2. Weatherproofing and Safety Tips
Outdoor cameras are exposed to harsh conditions: rain, wind, dust, and extreme temperatures. Here’s how to protect your power setup:
2.1 Use Weatherproof Boxes
Protect adapters, cables, and connectors in IP-rated waterproof boxes. These prevent water ingress and electrical short circuits.
2.2 Outdoor Extension Cords
If using AC power, ensure cords are:
- Rated for outdoor use
- Secured along walls or underground
- Protected from pets and lawn tools
2.3 Solar Panel Placement
For solar cameras, install panels in direct sunlight—ideally south-facing in the Southern Hemisphere.
3. Choosing the Right Power Method: Quick Comparison
| Power Type | Installation Difficulty | Reliability | Cost | Best Use Case |
| AC Plug-in | Easy | High | Low | Front porch, garage, backyard |
| PoE (Ethernet) | Moderate to Hard | Very High | Medium | Large homes, offices, commercial |
| Battery/Solar | Very Easy | Medium-High | Medium | Remote locations, DIY installations |
4. Common Power-Related Mistakes to Avoid
- Using indoor-rated cables outdoors → Can lead to overheating, water damage, or fire risk.
- Overloading power outlets → Always use one camera per socket unless using a surge-protected power board.
- Skipping voltage check → Some cameras need 12V, others need 5V or PoE (48V). Check before plugging in.
- Leaving connectors exposed → Use weatherproof junction boxes or covers to seal all joints.
5. Do You Need a Professional Installer?
If you’re unsure about:
- Running power cables
- Weatherproofing connections
- Choosing the right power source
- Connecting PoE networks
…then hiring a professional is the safest, most efficient option.
Recommended for:
- Multi-camera systems
- Commercial properties
- Large residential homes
- Anyone wanting peace of mind
Looking for Installation Help in Adelaide?
If you’re in Adelaide and want your outdoor security cameras powered and installed professionally, check out:
👉 Aussie Tech Solutions – CCTV Installation in Adelaide
Why choose them?
- Expert camera placement and setup
- Power-safe and weatherproof installations
- Solar, PoE, and battery options available
- Full configuration of mobile access and alerts
- Affordable packages for homes and businesses
Final Thoughts: Powering Outdoor Cameras the Smart Way
The right power source is the backbone of any effective outdoor surveillance system. Whether you go wired, wireless, or solar, make sure your setup is weather-resistant, secure, and reliable.
To recap:
- Wired setups are stable and great for permanent installs
- PoE is ideal for large systems with centralized control
- Battery/solar options offer flexibility and easy setup
- Always weatherproof and follow safety standards
Need help with installation or choosing the right setup?
👉 Click here to book your CCTV installation in Adelaide

